
That’s when I discovered the world of beginner-friendly keyboard kits, and the Keeble keyboard is one of the most popular gateways into this hobby. If you’ve ever been curious about moving beyond generic, store-bought keyboards but felt intimidated, you’ve come to the right place. This guide is for you. We’re going to walk through everything you need to know about the Keeble keyboard, in simple, easy-to-understand language. By the end, you’ll know exactly what it is, why it might be your perfect first project, and how you can build one yourself.
What Exactly is a Keeble Keyboard?
Let’s start with the most basic question. A Keeble keyboard isn’t a pre-built, ready-to-use keyboard like you’d buy from a brand like Logitech or Dell. You can’t just take it out of a box and start typing. Instead, think of it as a high-quality DIY project kit.
The “Keeble” is a brand or model name for a kit that includes the core components you need to build a custom mechanical keyboard. Typically, this kit includes:
-
The Case: This is the outer shell that holds everything together. It defines the look, angle, and often the sound of your keyboard. Keeble cases often come in materials like aluminum, which feels premium and heavy, giving the keyboard a solid, non-slip base.
-
The Plate: This is a metal or plastic sheet that sits inside the case. The switches snap into this plate. It’s crucial because it adds rigidity and changes how the keyboard feels when you type. A steel plate will feel stiffer, while a brass plate might feel a bit more solid and sound different.
-
The PCB (Printed Circuit Board): This is the brain of the operation. It’s the green (or sometimes black) board full of circuits that registers your key presses and sends the signal to your computer. This is the most technical part of the kit.
The magic of many Keeble PCBs, and what makes them so great for beginners, is that they are often “hot-swappable.” This is a game-changer. It means the PCB has special sockets that allow you to push switches in and pull them out without any soldering. You don’t need a soldering iron or any technical electronics skill. If you want to change your switches later, you just pull them out and push new ones in. It makes experimentation incredibly easy.
So, in a nutshell, a Keeble keyboard kit gives you the foundation. You provide the switches and keycaps, and a little bit of your time to assemble it. This might sound like extra work, and it is, but the reward is a keyboard that is uniquely yours, tailored to your exact preferences for sound, feel, and look.
Why the Keeble is the Perfect First Custom Keyboard Kit
You might be wondering, “Why go through all this trouble?” I had the same thought. But after building several keyboards, including a Keeble-like kit as my first, I can tell you the benefits are real and tangible.
First, there’s the typing experience. A pre-built keyboard from a big brand is designed to be mass-produced and profitable. Compromises are made. The plastic might be thin and hollow, the stabilizers on the large keys like the spacebar might rattle, and you’re stuck with whatever switches the manufacturer chose. With a Keeble, you are in control. You can choose switches that are buttery smooth, tactically satisfying, or clickily loud. You can add sound-dampening foam inside the case to eliminate any hollow echo, creating that rich, deep sound that typing enthusiasts love. The first time you type on a well-built custom keyboard, you’ll understand. It’s not just typing; it’s a sensory experience.
Second, it’s about personalization and expression. Your keyboard is a tool you likely use for hours every day. Why should it look and feel like everyone else’s? With a Keeble kit, you choose the keycap color and style. You can have vibrant, double-shot ABS keycaps with legends that will never fade, or beautiful, dye-sublimated PBT keycaps that have a rough, textured feel. You can add artisan keycaps for flair. Your keyboard becomes a reflection of your personality, not just a generic accessory.
Finally, and this is a key point for beginners, the Keeble is designed to be accessible. The hot-swappable PCB we talked about is the main reason. It completely removes the biggest barrier to entry: soldering. Soldering isn’t inherently difficult, but it can be scary for a first-timer. The fear of burning yourself or ruining an expensive PCB is real. Hot-swap sockets eliminate that fear. The build process is often straightforward, with many community-made video guides and tutorials available online. You are not alone in this journey. There’s a huge, welcoming community of keyboard enthusiasts who are always happy to help newcomers.
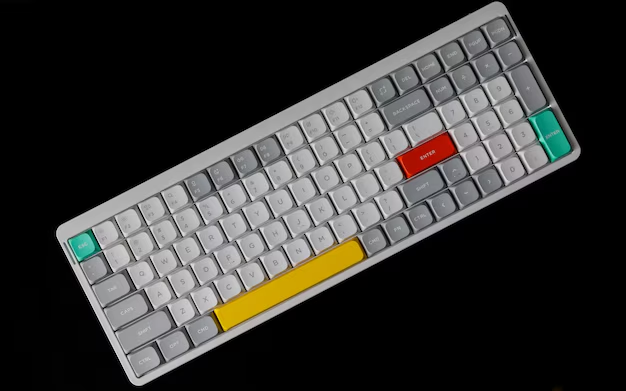
What’s Inside the Box? Anatomy of a Keeble Kit
Before we start building, let’s do a virtual unboxing. When your Keeble kit arrives, here’s what you can typically expect to find:
-
The Aluminum Case: This will likely be the heaviest part. It might come in several pieces – the top frame, the bottom base, and sometimes a weight or a piece of diffused plastic for RGB lighting. It feels substantial in your hands, immediately signaling that this is a quality product.
-
The Metal Plate: Usually made of aluminum or steel. It will have cutouts for every key switch on the keyboard. You’ll notice it’s quite rigid.
-
The Hot-swap PCB: This is the delicate one. Handle it by the edges to avoid touching the circuits and potentially causing static damage. You’ll see the hot-swap sockets, which look like little plastic and metal housings, at every key position. You’ll also see a USB-C port on one side, which is how you’ll connect it to your computer.
-
Stabilizers (Stabs): These are the little plastic and wire assemblies that go under the larger keys like the Spacebar, Enter, Shift, and Backspace keys. Their job is to stabilize these long keys so they don’t wobble when you press them on either side. Cheap stabilizers are the number one cause of a rattly, cheap-sounding keyboard. Most kits include decent stabilizers, but many enthusiasts immediately replace or modify them.
-
Screws and Standoffs: A small bag with various screws to hold the plate and PCB together inside the case.
-
A USB-C Cable: To connect your finished masterpiece to your computer.
What’s not in the box are the switches and keycaps. These are your personal choices, and you need to buy them separately.
A Simple Step-by-Step Guide to Building Your Keeble
Now for the fun part. Let’s walk through the assembly process. Don’t worry; we’ll take it slow. Set aside a couple of hours in a well-lit, clean space. A large table is your best friend here.
Step 1: Prepare Your Stabilizers (The Most Important Step for a Good Sound)
This is a step that many beginners rush, but taking your time here pays off massively. The stabilizers need to be smooth and quiet. Out of the box, they are often dry and can rattle.
The pro-method is to “lube” them. This involves applying a special grease (like dielectric grease or a dedicated stabilizer lubricant) to the parts of the wire that contact the plastic housing and on the plastic stems themselves. This lubricant dampens the metal-on-plastic contact, eliminating rattle and making the keypress smooth and silent. You can find many short video tutorials on “stabilizer lubing” online. It sounds technical, but it’s just about carefully applying grease with a small brush to the right spots. Once lubed, snap them into the PCB. They will click into place on the designated spots for the big keys.
Step 2: Test Your PCB
Before you put everything together, it’s a brilliant idea to test the PCB. Plug the USB-C cable into the PCB and your computer. Use a pair of tweezers (or even a paperclip) to briefly touch the two metal contacts in one of the hot-swap sockets. This simulates a key press. You can use a website like “keyboard tester” to see if the key registers. Do this for a few keys, especially the ones around the edges. This ensures your PCB is working perfectly before you spend time installing all the switches.
Step 3: Install the Switches
Now, the satisfying part. Take your switches. Look at the bottom – you’ll see two metal pins and a large plastic pin. The hot-swap sockets have holes that match this configuration.
Gently but firmly push the switch into the plate and down into the socket. Make sure the switch is straight. You should hear a clear snap as it seats into the plate and the pins slide home into the sockets. There is no force required; if it doesn’t go in easily, check that it’s aligned properly. Do this for every key. It’s a very therapeutic process!
Step 4: Mount the PCB Assembly into the Case
Once all switches are in, you have a complete “PCB assembly” (the plate with switches attached to the PCB). Now, carefully place this entire assembly into the top part of the keyboard case. There will be screw holes that line up with standoffs in the case. Use the provided screws to secure the PCB assembly to the case. Don’t overtighten them; just snug them up enough so that nothing moves.
Step 5: The Final Touch: Putting on Your Keycaps
You’re almost there! Take your keycap set. Each keycap has a cross-shaped stem on the underside. Simply line up the stems with the cross-shaped stem of the switches and press down firmly until the keycap sits snugly. Start with the larger keys with stabilizers, like the spacebar. When you put on the spacebar, make sure it’s straight and presses down evenly on both sides. If it gets stuck, just pull it off (a keycap puller tool is best for this) and try again.
And that’s it! Plug it in, and your custom Keeble keyboard is ready for action.
Making it Yours: Choosing Switches and Keycaps
This is where your personality comes in. The choices can be overwhelming, so here’s a simple breakdown.
Choosing Switches:
Switches are the heart of the feel and sound. They come in three main types:
-
Linear: These are smooth all the way down. There is no bump or click. They are preferred for gaming and provide a consistent, buttery feel. Examples: Gateron Yellow, Gateron Black, Cherry MX Red. If you just want a smooth, quiet press, go linear.
-
Tactile: These have a small bump that you can feel halfway through the press. This tactile feedback lets you know the key has been activated without having to press it all the way down. Many people find this improves typing accuracy and speed. Examples: Gateron Brown, Glorious Panda, Durock T1.
-
Clicky: These are both tactile and make a loud, audible “click” sound at the point of activation. They are the classic “mechanical keyboard” sound but can be disruptive in quiet offices. Examples: Cherry MX Blue, Kailh Box Jade.
My advice for a first build? Get a switch tester. This is a small plastic board with about 10-20 different switches on it. You can press each one and feel the difference for yourself. It’s a small investment that saves you from buying a full set of switches you might not like.
Choosing Keycaps:
Keycaps are about feel and look. The two main plastics are:
-
ABS: Often smoother and can develop a shiny look over time with use (called “shine”). However, high-quality ABS keycaps can have incredibly sharp legends and vibrant colors.
-
PBT: Generally considered more premium. They have a slightly rough, textured feel that is pleasant to the touch. They are more durable and resistant to shine. PBT keycaps are often a bit more expensive.
You also need to consider the profile – the shape and height of the keycaps. Some are flat, some are sculpted. A very safe and popular profile for beginners is called “Cherry Profile.” It’s a sculpted profile that is comfortable for most people.
Conclusion: Is the Keeble Keyboard Right for You?
Building a Keeble keyboard is more than just assembling computer parts; it’s a journey into understanding a tool you use every day. It’s about creating something with your own hands that is perfectly tailored to you.
So, is the Keeble keyboard right for you? If you are someone who spends a significant amount of time at your computer, whether for work, gaming, or creative projects, and you crave a better, more personal, and more satisfying typing experience, then the answer is a resounding yes.
If you are intimidated by the idea of building something electronic, let the hot-swap PCB put your mind at ease. It is designed for you. The process is straightforward, the community support is vast, and the feeling of pride and enjoyment you get every time you sit down to type on a keyboard you built yourself is absolutely priceless. It transforms a mundane tool into a source of daily joy. Take the plunge; you won’t regret it.
Frequently Asked Questions (FAQ)
Q1: How much does a complete Keeble keyboard build cost?
A: The cost can vary widely. The kit itself might range from $80 to $150. A good set of switches can be $30-$60, and a nice set of keycaps another $40-$100. So, for a complete, quality build, you should budget anywhere from $150 to $300 or more. It’s more expensive than a basic pre-built, but you are paying for premium materials, customizability, and a vastly superior experience.
Q2: I’m not good with technical stuff. Can I really build this?
A: Absolutely. If you can follow a recipe or assemble a piece of flat-pack furniture, you can build a hot-swap Keeble keyboard. The process is largely mechanical – screwing things together and snapping components into place. The most complex part, the electronics, is already done for you on the PCB.
Q3: Where is the best place to buy a Keeble keyboard kit?
A: They are often sold by specialized online vendors in the mechanical keyboard community. Websites like KBDFans, CannonKeys, or Divinikey are popular starting points. Always check the vendor’s reputation on community forums like Reddit’s r/MechanicalKeyboards before buying.
Q4: Does the Keeble keyboard have RGB lighting?
A: Most modern Keeble PCBs do include RGB lighting, both for underglow (lighting around the bottom of the case) and per-key backlighting. You can usually control this with dedicated key combinations or via software.
Q5: What if my keyboard doesn’t work after I build it?
A: Don’t panic! The most common issues are a loose USB cable or a switch that isn’t fully seated in its socket. Go back and firmly press every switch into the PCB. If a specific key isn’t working, try replacing that one switch. If the whole board is dead, check your cable and try a different USB port on your computer. The community forums are an excellent resource for troubleshooting.